
Blog
A Step-by-Step Guide to Smart Thermostat Installation for Beginners
Step One: Beginning the Smart Thermostat Installation Process
When embarking on the smart thermostat installation process, it is crucial to follow a systematic approach. Starting with the right foundation ensures a successful integration of this advanced technology into your home. To begin, gather all the necessary tools and materials required for the installation, including a screwdriver, wire strippers, a voltage tester, and, most importantly, the smart thermostat itself.
Once you have assembled the required items, carefully review the manufacturer’s installation instructions. Familiarize yourself with the specific requirements and recommendations provided. By following these guidelines, you can ensure a smooth installation process with minimal errors or complications.
Before proceeding, prioritize safety by turning off the power to your HVAC system. Locate the circuit breaker that controls the HVAC system and switch it off. It is essential to use a voltage tester on the wires connected to the thermostat to verify that the power is indeed off, ensuring a safe working environment.
Step Two: Choosing the Right Thermostat Location
Choosing the optimal location for your smart thermostat is vital to maximize its performance and functionality. Ideally, select a central area in your home that is away from direct sunlight, drafts, and heat sources that may affect temperature readings.
Ensure that the chosen location allows for proper airflow around the thermostat. Avoid placing it behind furniture or in areas with restricted air circulation. Additionally, make sure the thermostat is easily accessible for programming and adjustments.
Consider the compatibility of the chosen location with the existing wiring. Ensure that the wiring is easily accessible and has the necessary connections to support the smart thermostat’s installation. If needed, consult a professional electrician to assess the wiring and make any required modifications.
Step Three: Removing the Old Thermostat
Prior to installing your smart thermostat, it is essential to remove the old thermostat properly. Start by turning off the power to the HVAC system at the circuit breaker. This precautionary measure eliminates any electrical hazards during the removal process.
Next, remove the cover of the old thermostat to expose the wiring. Take note of the wire labels or color-coded system used for identification. Carefully disconnect each wire from the old thermostat, ensuring they do not fall back into the wall. To avoid confusion during the installation of the new thermostat, consider labeling the wires according to their corresponding terminals.
Once all the wires are disconnected, remove the mounting plate of the old thermostat from the wall. Ensure that any remaining wires are safely tucked back into the wall. Finally, clean the wall surface to ensure a smooth and secure attachment for the new thermostat.
Step Four: Wiring the Thermostat
With the old thermostat removed, it is time to wire the new smart thermostat. Begin by referring to the manufacturer’s instructions for the specific wiring configuration of your model. Following these guidelines precisely is crucial to ensure proper functionality.
Start by connecting each labeled wire to its corresponding terminal on the new thermostat. Use the provided screwdriver to secure the wires in place. Pay attention to avoiding any loose connections or crossed wires, as these can lead to malfunctions or damage to the thermostat.
Once all the wires are securely attached, gently push the excess wiring back into the wall cavity. Ensure that no wires are pinched or damaged during this process. Finally, attach the new thermostat’s mounting plate to the wall, aligning it with the pre-existing holes or marks left by the old thermostat.
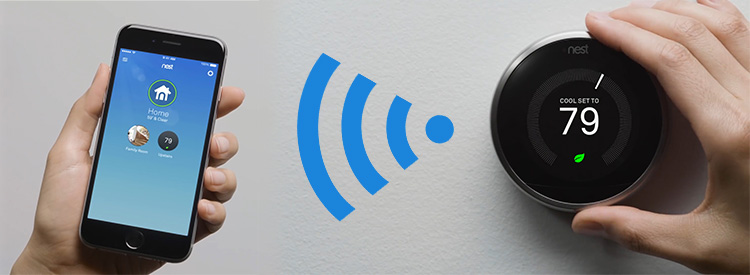
Step Five: Pairing the Thermostat to Wi-Fi and Setting Up With the Cync Smart App
After completing the physical installation of the smart thermostat, it is time to pair it with your home’s Wi-Fi network and set it up using the Cync Smart App. Start by turning on the power to the HVAC system at the circuit breaker. This will provide the necessary power for the thermostat to function.
Using the manufacturer’s instructions, locate the Wi-Fi setup option on the thermostat’s interface. Follow the prompts to connect the thermostat to your home’s Wi-Fi network. Ensure that you have the correct network name and password available for a seamless connection.
Once connected to Wi-Fi, download and install the Cync Smart App on your smartphone or tablet. Open the app and follow the on-screen instructions to create an account and set up your smart thermostat. This typically involves linking the thermostat to your account and configuring the desired settings, such as temperature preferences and scheduling.
Upon completing the setup process, you can now enjoy the convenience and energy-saving benefits of your newly installed smart thermostat. Utilize the Cync Smart App to remotely control and monitor your home’s temperature, ensuring optimal comfort and efficiency.
What You Need: Five-Wire Thermostat Cable
When installing a smart thermostat, it is crucial to have the appropriate wiring infrastructure in place. One common requirement is a five-wire thermostat cable, also known as a thermostat wire bundle. This cable consists of five individual wires, each serving a specific function in the operation of the HVAC system.
The five wires typically include:
- Rh or R: This wire connects to the heating power supply, usually from the furnace or boiler.
- Rc: This wire connects to the cooling power supply, often from the air conditioner or heat pump.
- C: The C wire, also known as the common wire, provides a continuous power supply to the thermostat. It is essential for the proper functioning of smart thermostats that require constant power.
- W: This wire connects to the heating system, activating it when the thermostat calls for heat.
- Y: This wire connects to the cooling system, signaling it to start when the thermostat requires cooling.
Prior to installing a smart thermostat, ensure that your HVAC system has the necessary wiring infrastructure, including a five-wire thermostat cable. If your existing setup lacks the C wire, there are workarounds available to overcome this limitation.
3 Workarounds When There Is No C-Wire
Option 1: Install a New Wire
If your HVAC system does not have a C wire, one effective solution is to install a new wire specifically for this purpose. This workaround involves running an additional wire from the HVAC system to the thermostat location. While it may require some additional effort and expertise, it ensures a reliable power source for your smart thermostat.
To install a new wire, it is advisable to consult a professional electrician who can assess your system’s requirements and safely run the necessary wiring. They will ensure that the new wire is properly connected to the HVAC system’s power supply and the thermostat location, allowing for the seamless integration of your smart thermostat.
Option 2: Buy a Thermostat That Does Not Require a C-Wire
When considering upgrading your thermostat, one option to explore is purchasing a thermostat that does not require a C-wire. These thermostats are specifically designed to operate without the need for a C-wire, making installation simpler and more accessible for homeowners who may not have a C-wire readily available. One type of thermostat that does not require a C-wire is a battery-powered thermostat. These thermostats rely solely on battery power for operation, eliminating the need for a C-wire installation. It is important to note that battery-powered thermostats may require more frequent battery changes to ensure uninterrupted functionality. Another option to consider is a thermostat that utilizes power harvesting technology. These innovative thermostats are designed to capture and store energy from temperature fluctuations in the home. By harnessing this energy, the thermostat can power itself without the need for a C-wire or batteries. This not only simplifies installation but also reduces the environmental impact of battery waste. It is crucial to conduct thorough research and select a thermostat that suits your specific needs and is compatible with your heating and cooling system. Consult the manufacturer’s specifications and guidelines to ensure a seamless installation process. With the right thermostat, you can enjoy enhanced control and energy efficiency without the hassle of dealing with a C-wire.
Option 3: Install a C-Wire Adapter
If you already have a thermostat that requires a C-wire but lack one in your current setup, installing a C-wire adapter is a viable solution. A C-wire adapter, also known as a power extender kit, acts as a bridge between your existing wiring and the thermostat, providing the necessary power for proper functioning. To install a C-wire adapter, follow the manufacturer’s instructions carefully. Typically, the process involves identifying the existing wiring, connecting the adapter to the appropriate terminals, and then connecting the thermostat to the adapter. Ensure all connections are secure and properly insulated to prevent any electrical hazards. Before proceeding with the installation, it is recommended to turn off the power to your heating and cooling system at the circuit breaker. This precautionary measure ensures your safety during the installation process. If you are unsure about any aspect of the installation, consult a professional HVAC technician who can provide expert guidance and assistance. Installing a C-wire adapter can be a cost-effective solution, allowing you to utilize a wider range of thermostats that require a C-wire. However, not all heating and cooling systems are compatible with C-wire adapters. Therefore, it is crucial to verify compatibility before purchasing and installing an adapter to avoid any potential issues or damage to your system.
When to Install a Smart Thermostat
Determining the right time to install a smart thermostat involves considering several key factors. If your current thermostat is outdated or malfunctioning, it may be an opportune time to upgrade to a smart thermostat. Smart thermostats offer precise temperature control, energy-saving algorithms, and remote access through smartphone apps. These features can greatly improve your comfort and energy efficiency, resulting in potential cost savings on your utility bills. Additionally, if you are looking to optimize your energy consumption and reduce your environmental footprint, a smart thermostat can be an excellent investment. These thermostats often include energy usage reports and insights, allowing you to monitor and adjust your heating and cooling patterns to minimize waste. By intelligently adapting to your schedule and preferences, smart thermostats can help you achieve a more sustainable home environment. Furthermore, if you value convenience and flexibility, a smart thermostat can provide unparalleled control over your HVAC system. Features such as geofencing and learning algorithms allow these thermostats to automatically adjust temperature settings based on your presence or absence, ensuring optimal comfort and energy efficiency. The ability to remotely control your thermostat from anywhere using your smartphone adds an extra layer of convenience and accessibility. The installation process for smart thermostats may vary depending on your specific heating and cooling system. Therefore, it is recommended to carefully read the manufacturer’s instructions and, if necessary, seek professional assistance to ensure a successful installation.
Safety Considerations
Safety should always be a top priority when installing or upgrading thermostats. Here are some important safety considerations to keep in mind during the installation process:
Materials Needed for Safety
Before starting the installation, gather the necessary materials to ensure a safe and smooth process. These materials may include:
- 1. Insulated gloves: Protect your hands from potential electrical hazards by wearing insulated gloves throughout the installation process.
- 2. Screwdrivers: Have a set of appropriately sized screwdrivers on hand to remove and install screws as required.
- 3. Wire strippers: These tools are essential for safely stripping and preparing wires for connection.
- 4. Voltage tester: Use a voltage tester to verify that the power is off before working on any electrical components. 5. Electrical tape: Ensure all connections are properly insulated by using electrical tape to secure and protect exposed wires.
By having these materials readily available, you can minimize potential risks and ensure a safe installation process. Remember to always follow the manufacturer’s instructions and consult a professional if you are unsure about any aspect of the installation.
Follow AVVATO on social media for the latest updates, product releases, and more.